
Connect Google Analytics
After creating and customizing your blog, the next important step is connecting Google Analytics. This tool helps you understand how visitors interact with your website and gives you valuable data about your blog traffic, audience, and content performance.
One mistake many beginners make is waiting too long before setting up analytics. Even if your blog is new and does not have many visitors yet, it is still important to connect Google Analytics early so you can start collecting data from the beginning.
With Google Analytics, you can track:
How many people visit your blog
Which blog posts get the most traffic
Where visitors come from
Which devices visitors use
How long readers stay on your pages
What pages people leave from
This information helps you improve your blog content and grow your website more strategically over time.
Create a Google Analytics Account
Before you connect Google Analytics to your blog, you need a Google account.
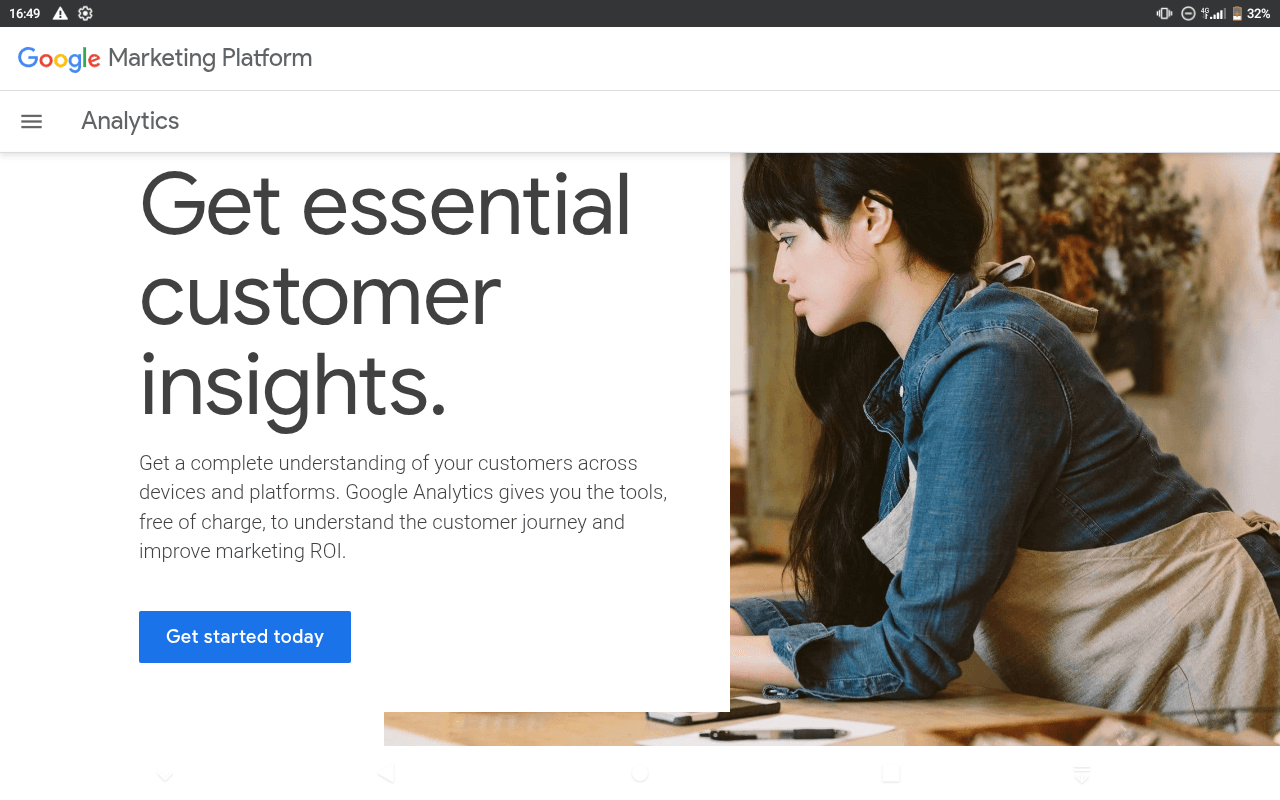
Once you have a Google account, go to Google Marketing Platform Analytics page.
When the page opens:
Click the button that says Get started today
Google Analytics setup includes five important steps.

Step 1: Account Creation
The first setup step is creating your account.
Inside the Account creation section, you will be asked to add an account name.
You can simply use your blog name.
Examples:
SBSAI
Cozy Kitchen Bite
Fashion Whispers
Sheila Templates
The account name helps organize all your analytics properties inside one dashboard.
After adding your account name:
Scroll down
Click Next
Step 2: Property Creation
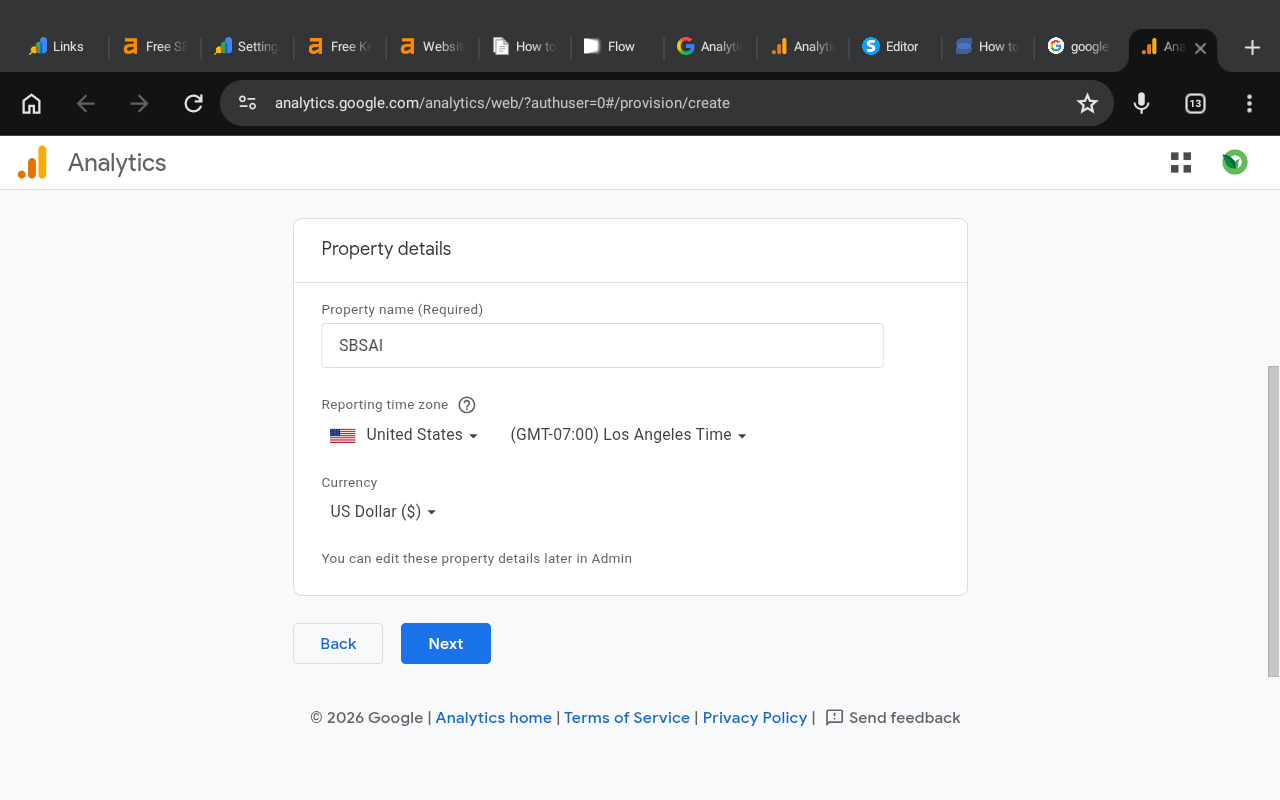
The second step is creating a Property.
A property represents the website, app, or platform you want Google Analytics to track.
You can use your blog name again or create a more specific name.
Examples:
SBSAI
SBSAI Blog
Cozy Kitchen Bite
Fashion Whispers Blog
You can create multiple properties under one Google Analytics account.
For example:
One property for your blog
Another property for your online store
Another property for a landing page
If you only want to track your blog specifically, adding the word “Blog” to the property name can help you stay organized later.
Choose Time Zone and Currency
Next, Google Analytics will ask for:
Reporting time zone
Currency
Choose the options that match your country or business preference.
Do not worry too much because you can edit these details later inside the Admin section.
Once complete:
Click Next
Step 3: Add Business Details
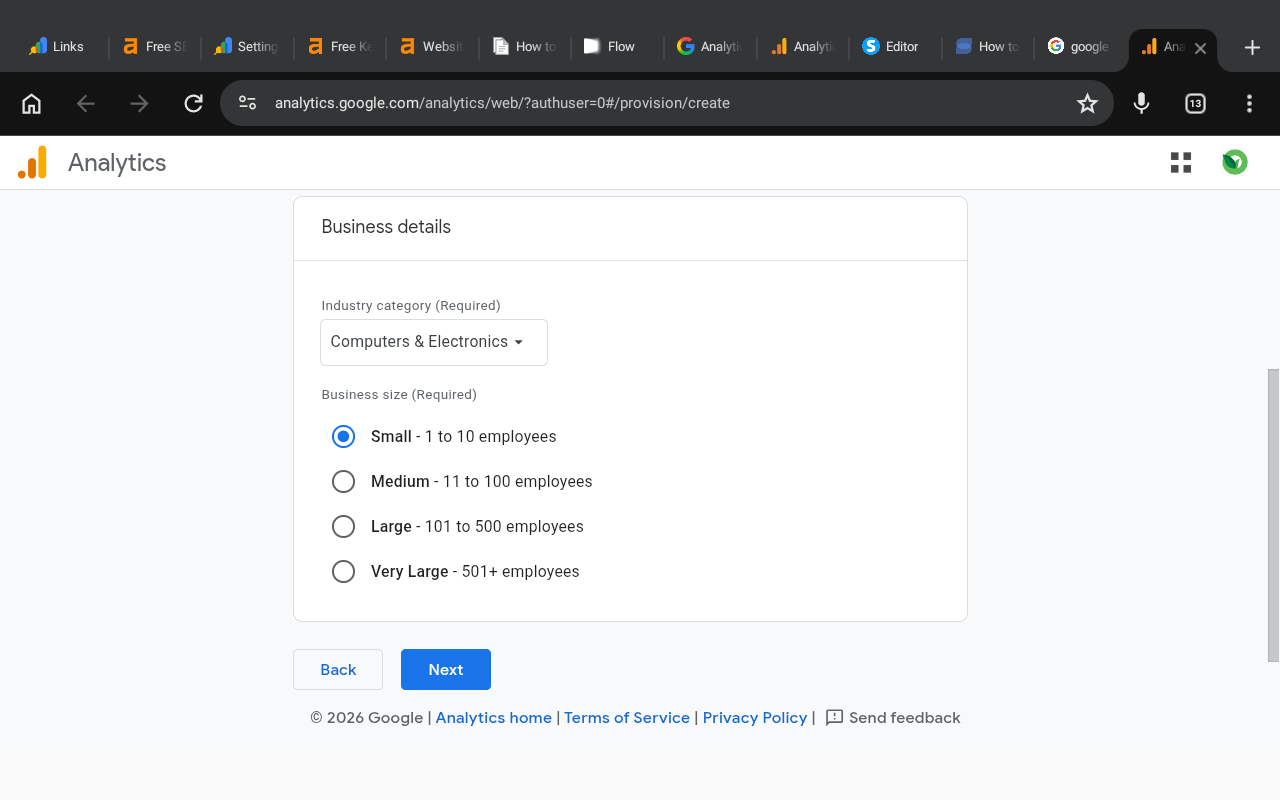
The next section is Business details.
This helps Google understand what your website is about so it can personalize recommendations and reporting.
Choose Your Industry Category
Select the category that best matches your blog niche.
Examples:
Tech blog → Computers & Electronics
Pet blog → Pets & Animals
Food blog → Food & Drink
Finance blog → Finance
Fitness blog → Health
For example:
If your blog is SBSAI and focuses on technology, you can choose:
Computers & Electronics
If your blog is about pets, choose:
Pets & Animals
Choose Business Size
Google Analytics will also ask about your business size.
If you manage the blog alone, select:
Small — 1 to 10 employees
Most beginner bloggers work independently without a large team, so this option works perfectly.
After completing the business details:
Click Next
Step 4: Select Business Objectives
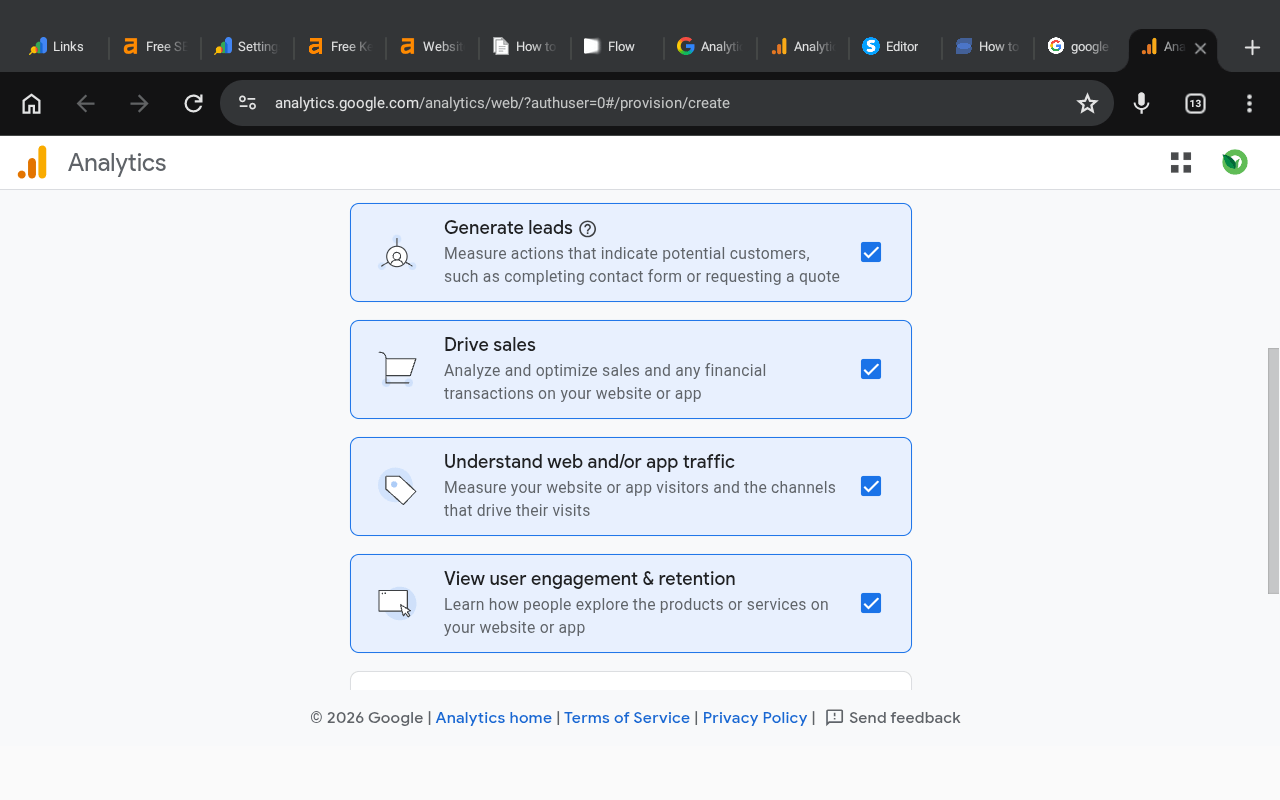
The next step focuses on your website goals and how you want to use Google Analytics.
Google will ask you to choose business objectives so it can personalize your dashboard and recommendations.
You will see these options:
Generate leads
Drive sales
Understand web and/or app traffic
View user engagement & retention
I recommend selecting all four options because each one provides useful reporting tools for bloggers.
These objectives help Google Analytics organize useful reports about:
Traffic growth
Audience behavior
Visitor engagement
Sales performance
Lead generation
After selecting all four options:
Click the Create button
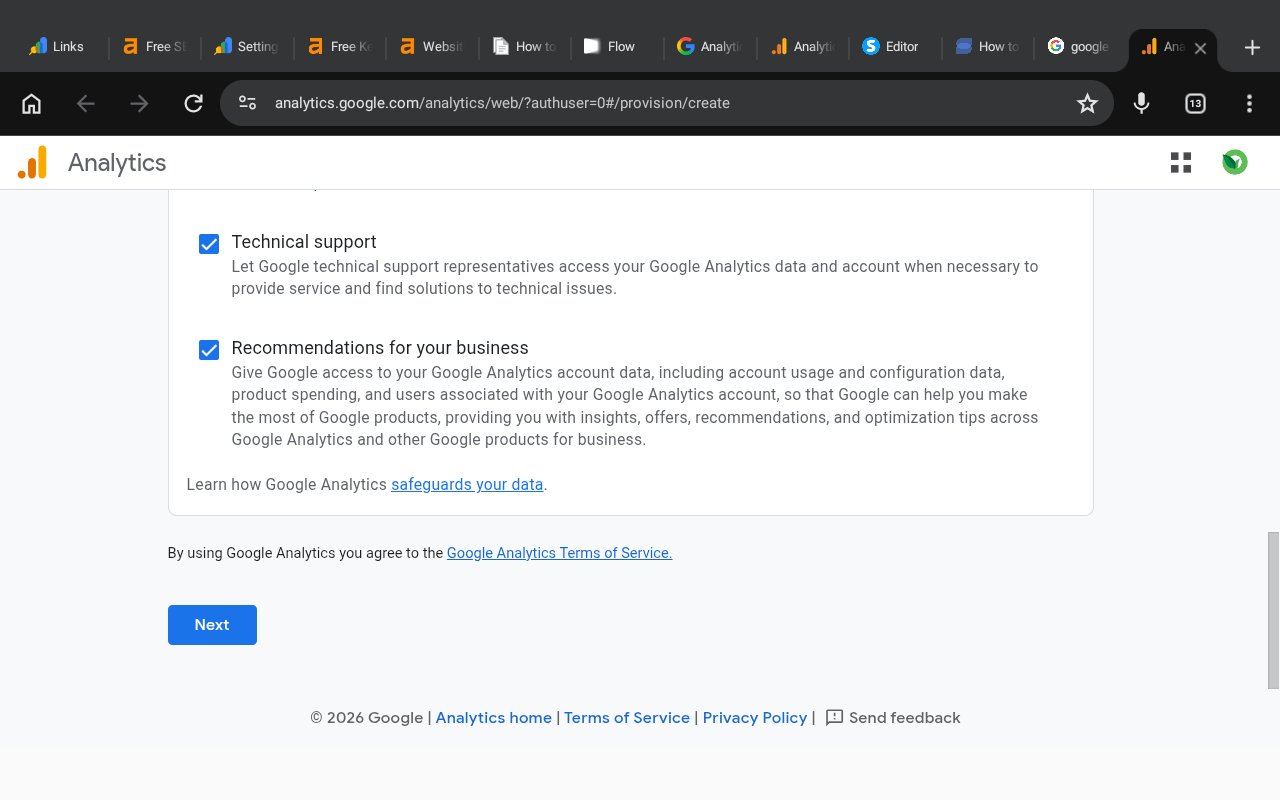
Accept Google Analytics Terms
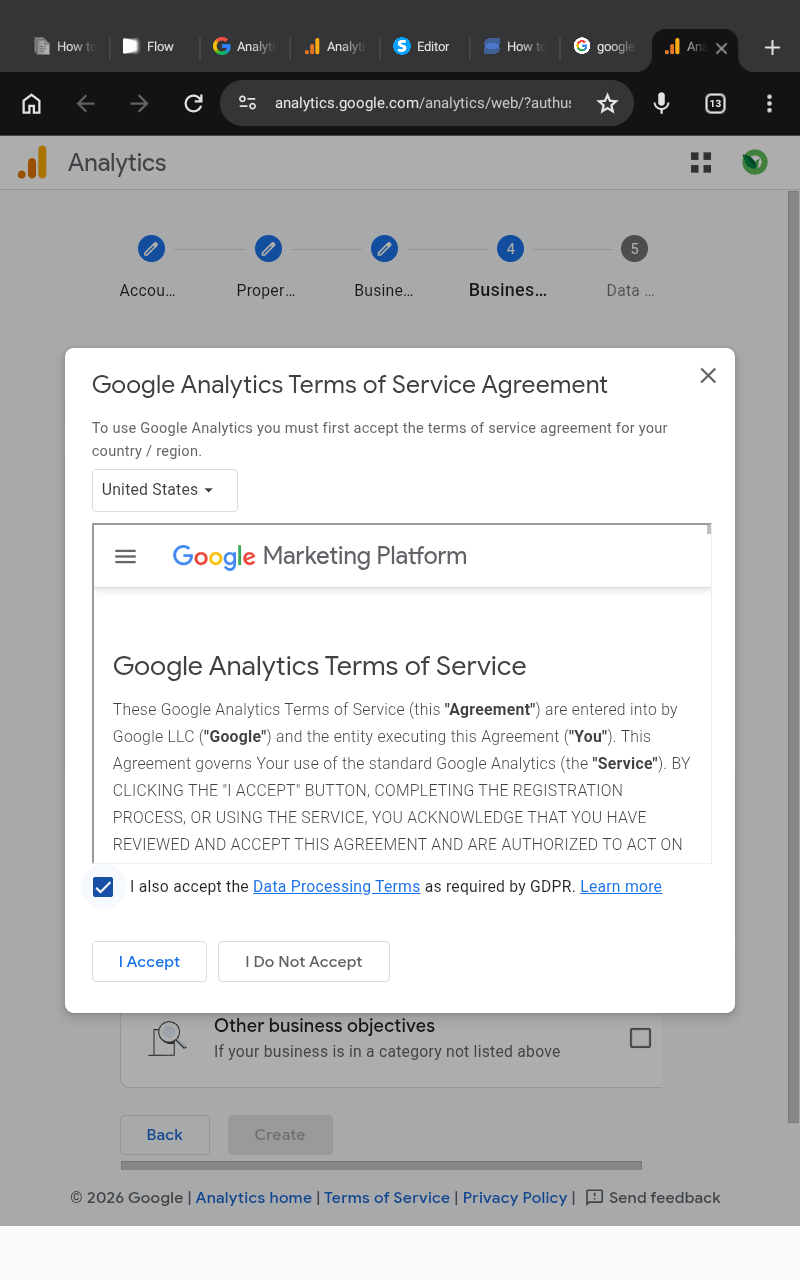
A popup window will appear containing the Google Analytics Terms of Service Agreement.
To continue:
Click the checkbox
Add a tick
Click I Accept
Once accepted, you will be redirected to the Data Collection setup section.
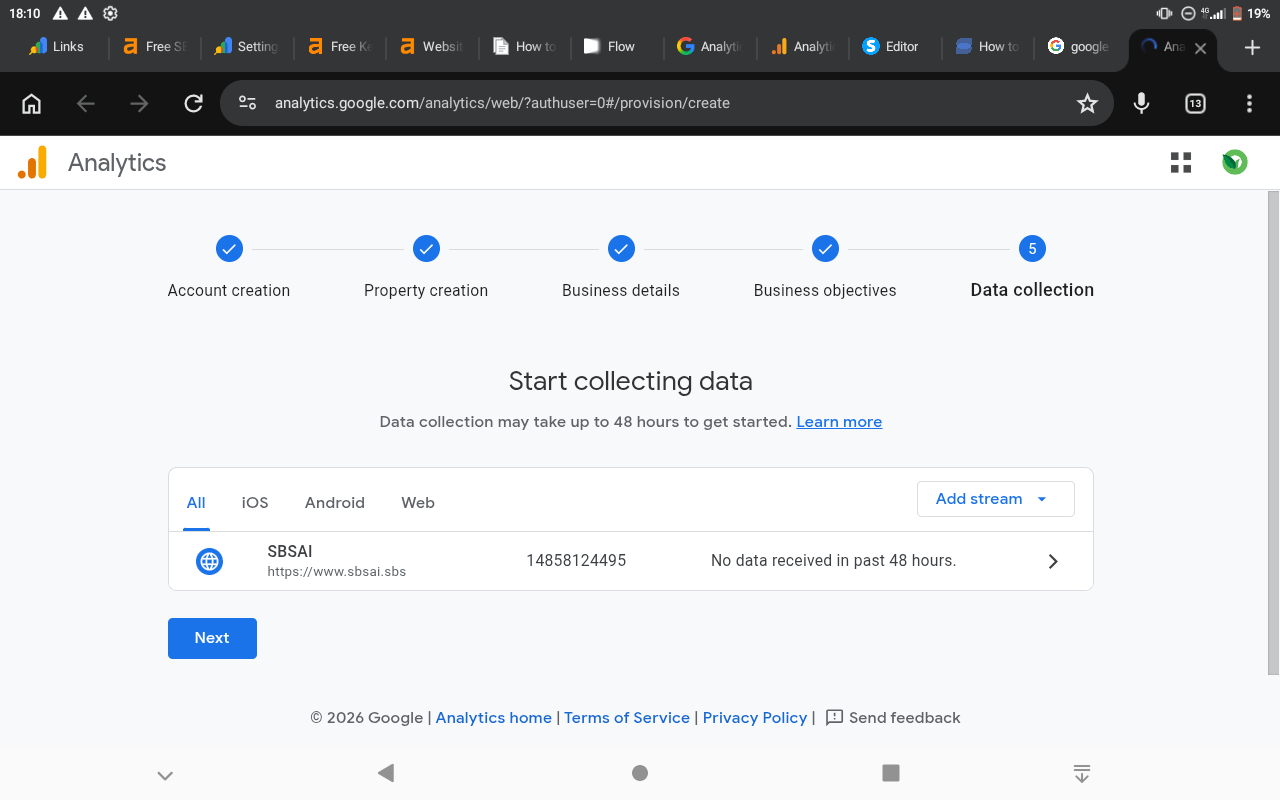
Step 5: Set Up Data Collection
This step tells Google where your traffic data will come from.
Inside the Choose a platform section:
Select Web

This option is used for blogs and websites.
You will now be redirected to the Set up data stream page.
Add Your Website Information
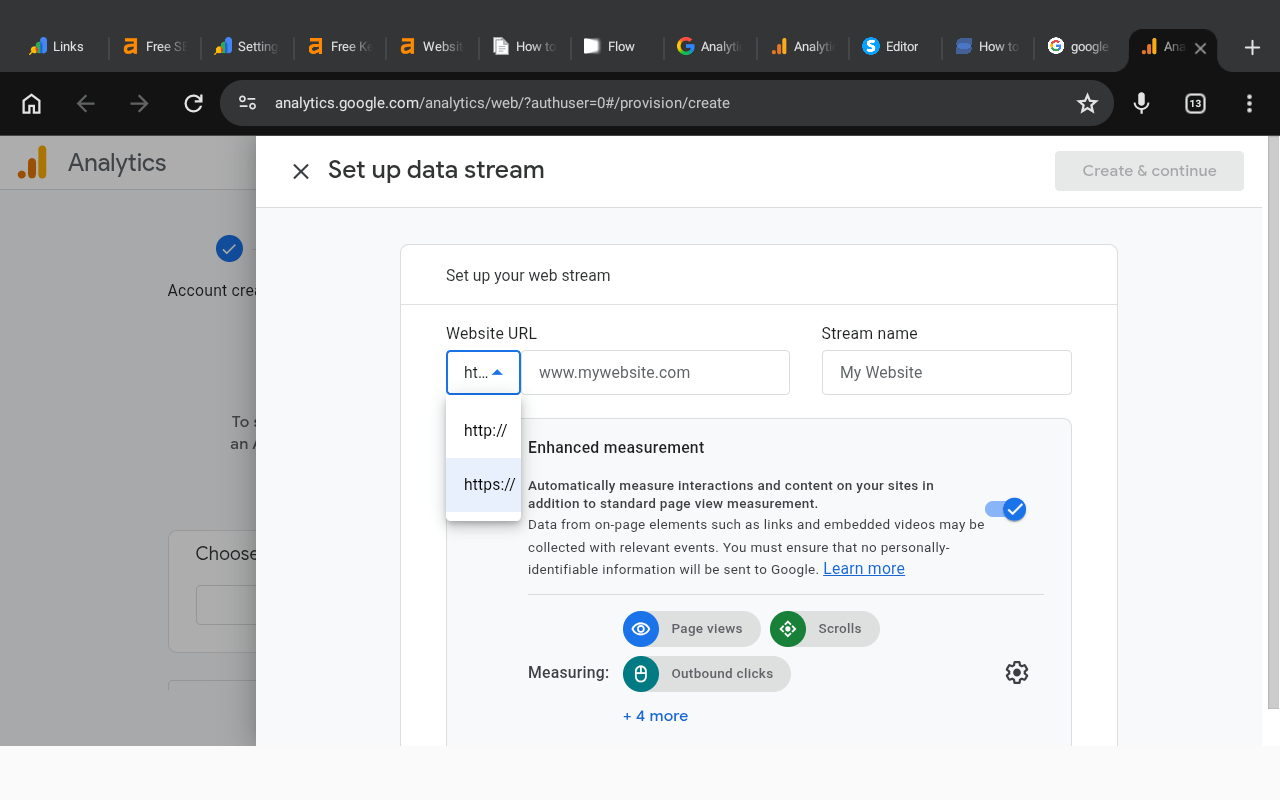
Now you need to add your blog details.
Website URL
First:
Select https
Then add your domain name.
Example:
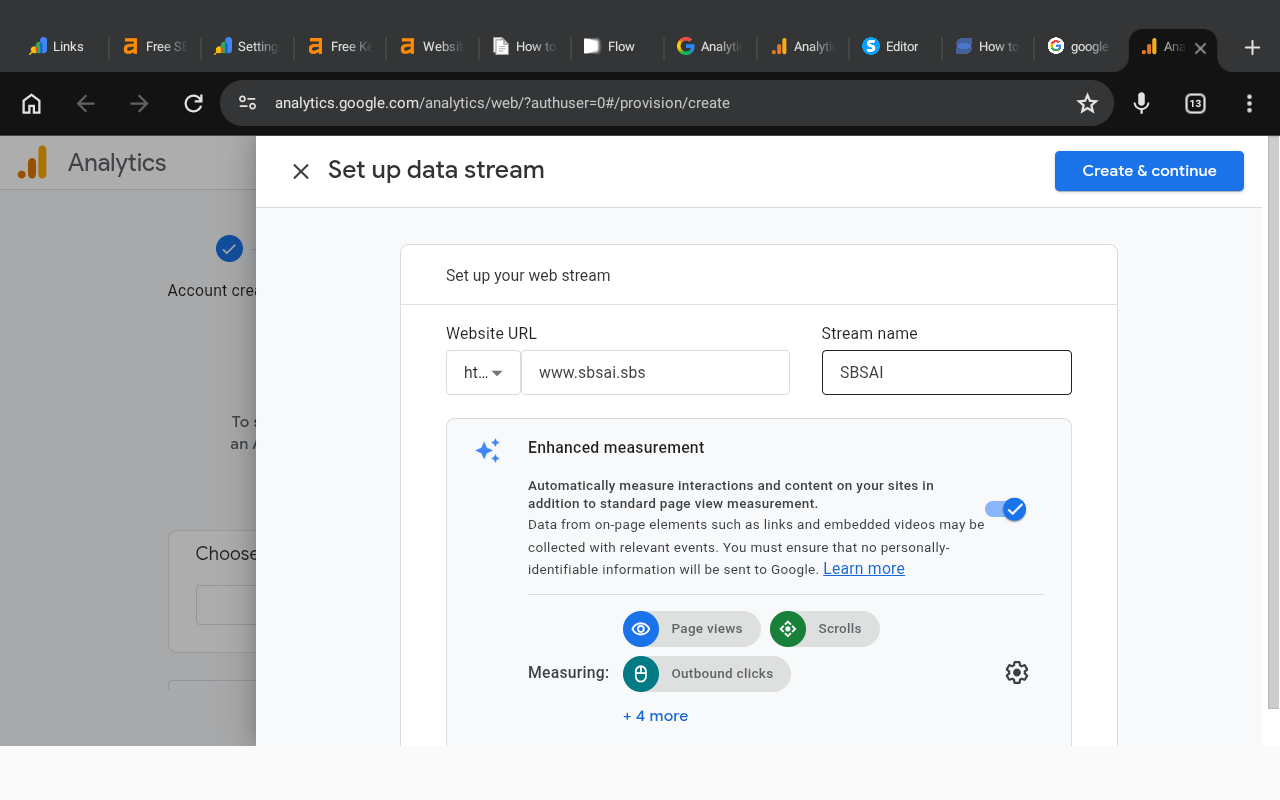
Stream Name
Next, add your stream name.
You can simply use your blog name.
Examples:
SBSAI
Cozy Kitchen Bite
Fashion Whispers
After filling out the details:
Click the button in the top right corner that says Create & continue
Wait a few seconds while Google creates your tracking setup.
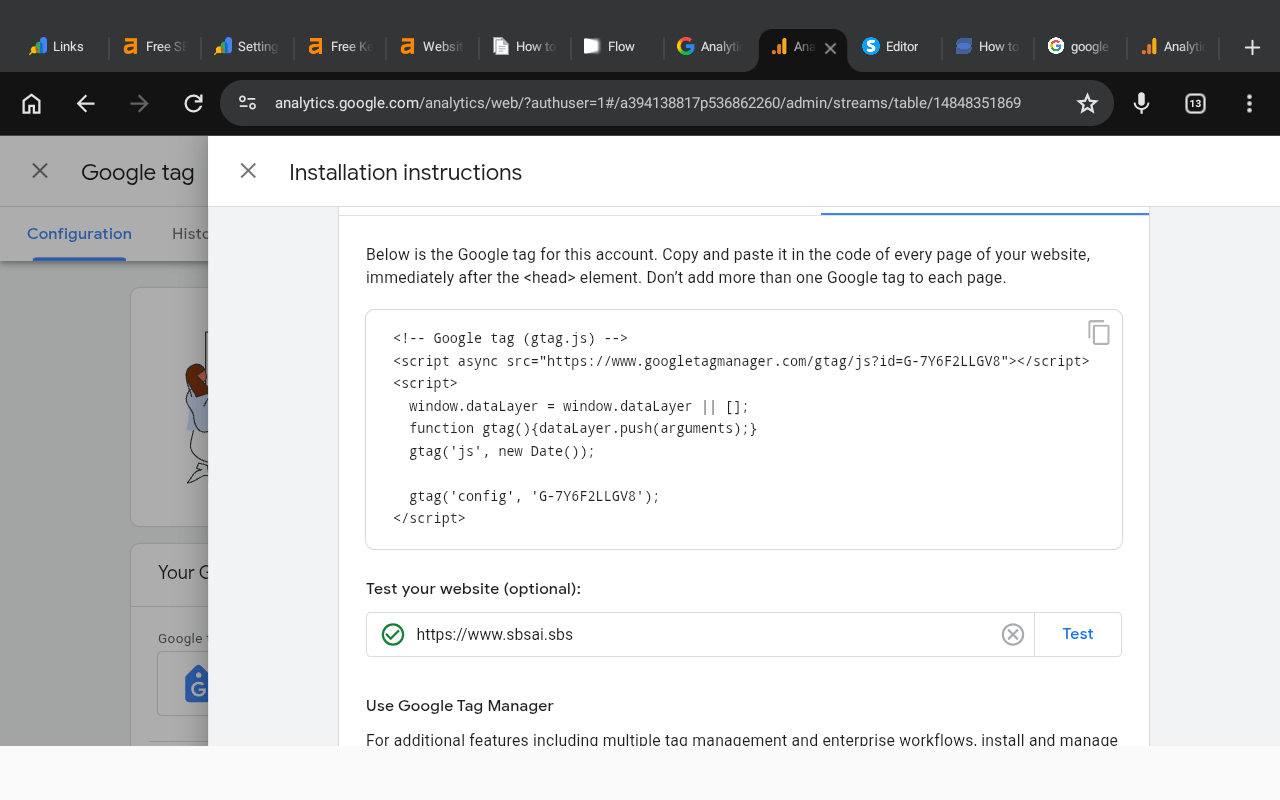
Copy Your Google Tag
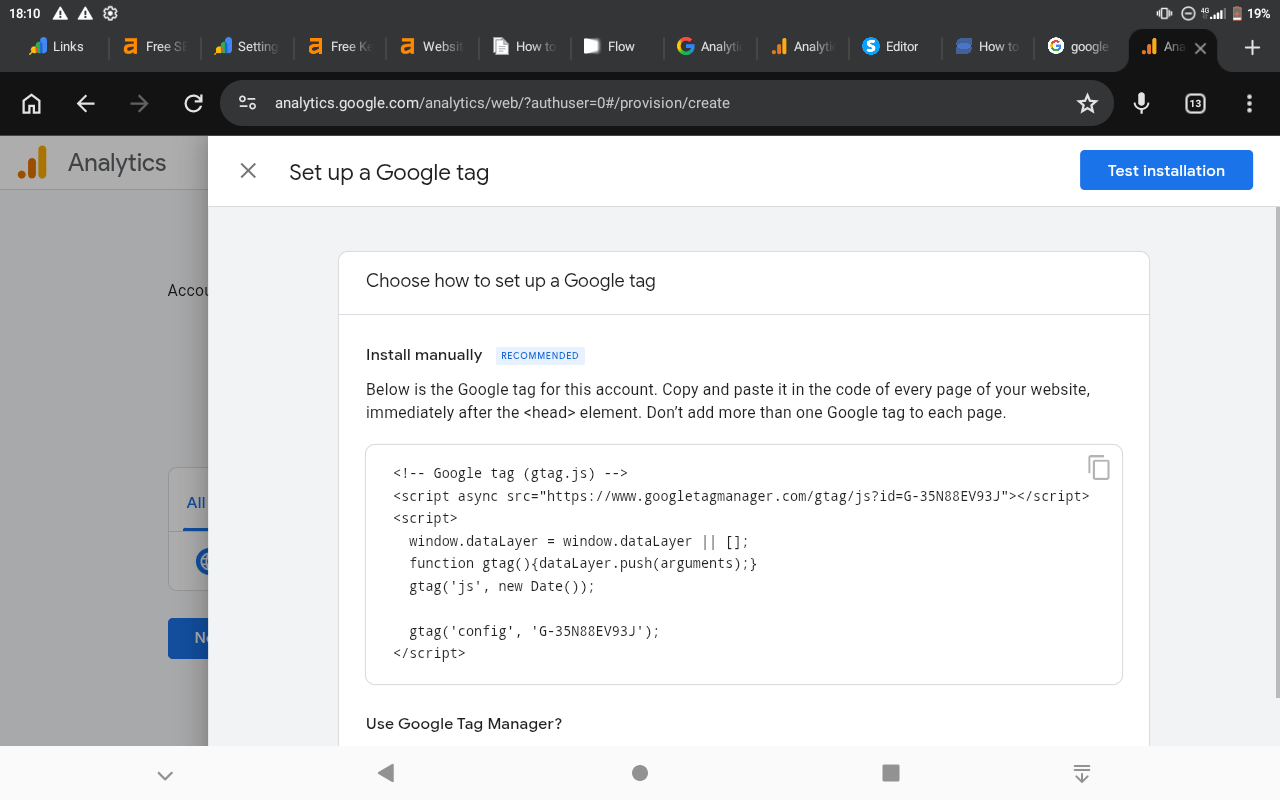
After setup is complete, Google Analytics will redirect you to the Set up a Google tag section.
Google will generate a tracking code similar to this:
<!-- Google tag (gtag.js) -->
<script async src="https://www.googletagmanager.com/gtag/js?id=G-35N88EV93J"></script>
<script>
window.dataLayer = window.dataLayer || [];
function gtag(){dataLayer.push(arguments);}
gtag('js', new Date());
gtag('config', 'G-35N88EV93J');
</script>
This is your Google tag.
Copy the entire code carefully because you will now add it to your blog.
Add Google Analytics to Systeme.io
Next, return to your systeme.io dashboard.
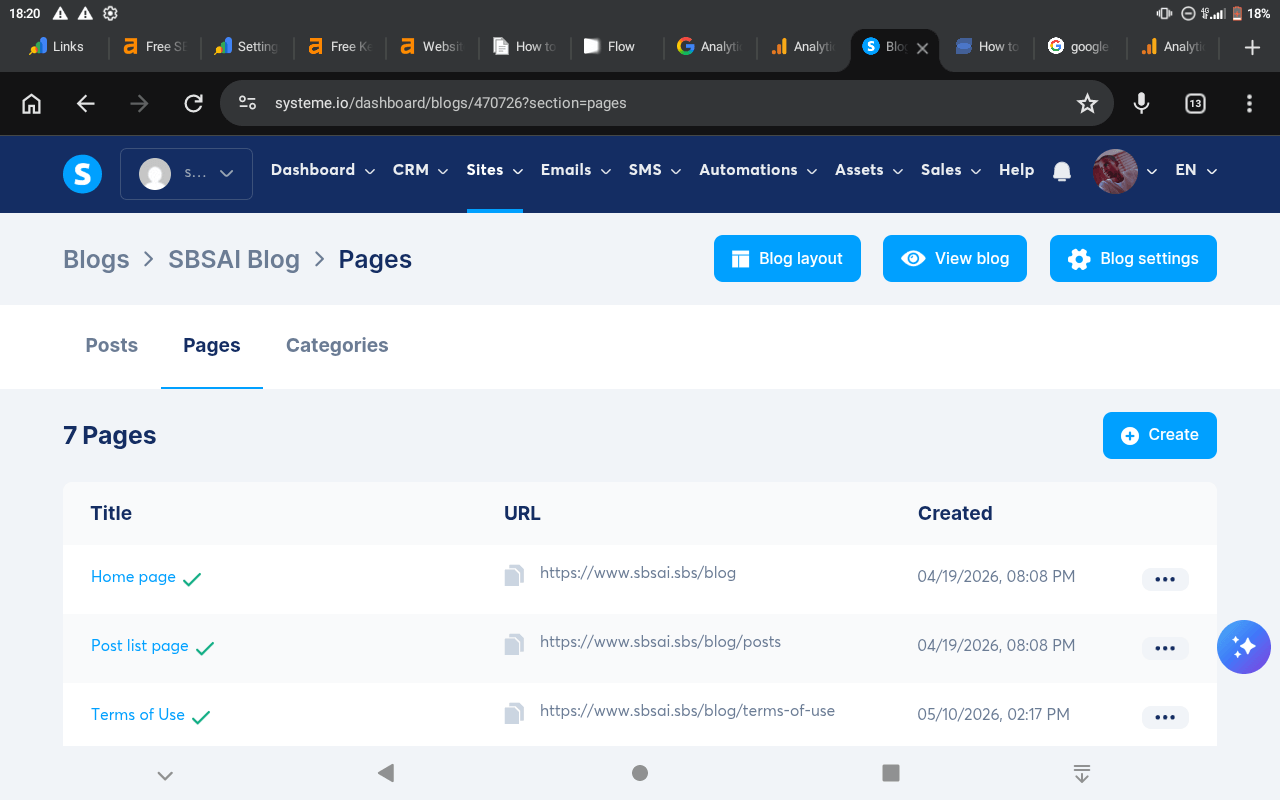
Open your blog management area and follow these steps:
Click on Blog layout
Open the Blog layout editor
Click Settings
Scroll down to the Tracking section
Click Edit header code
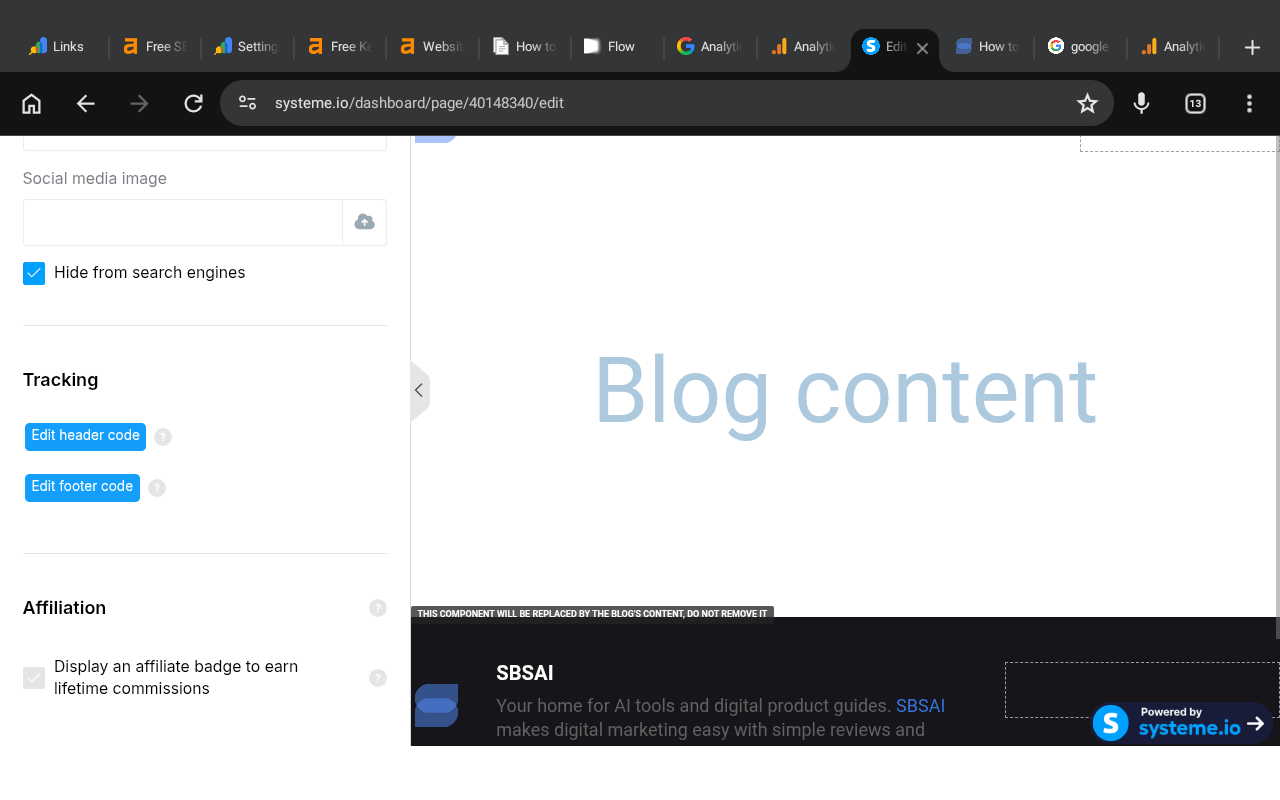
A popup editor will appear.
Paste your Google tag code into this section.
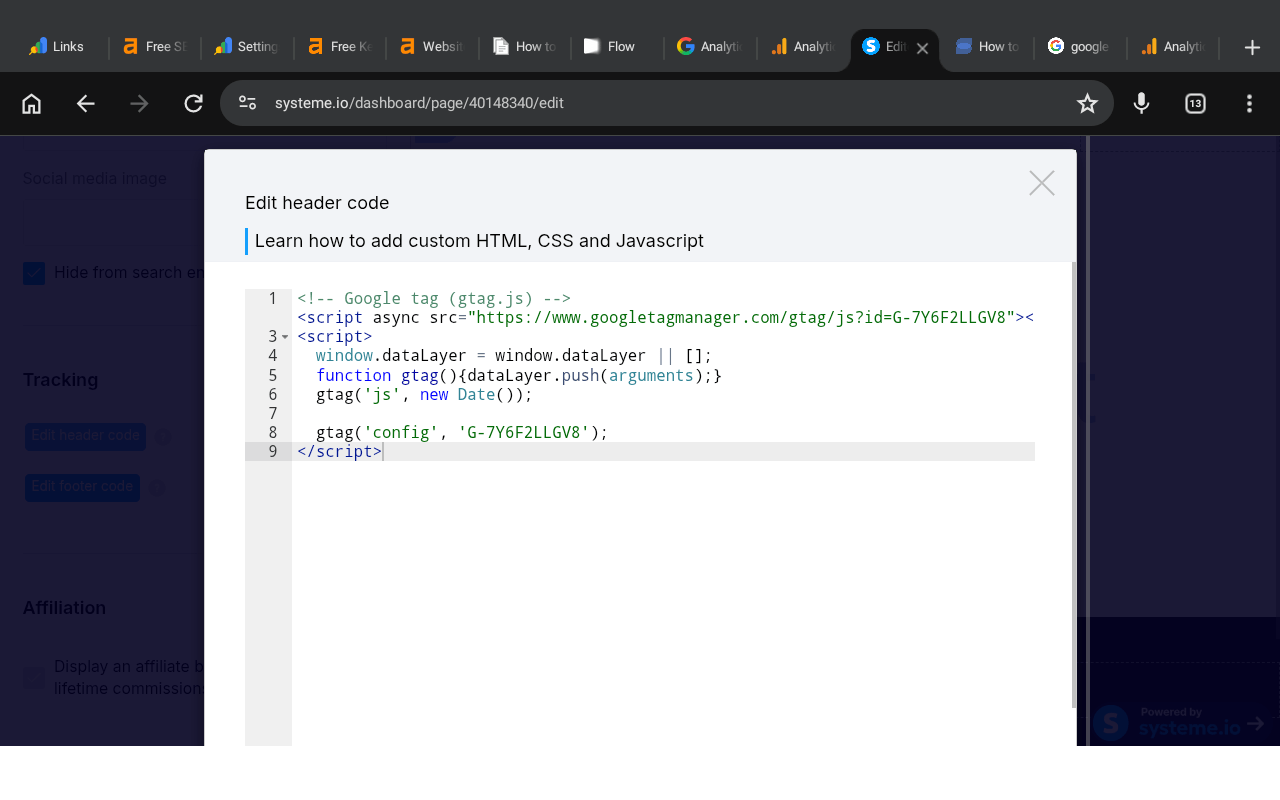
After pasting the code:
Click Save
Then click Save again inside the Blog layout editor
We are using the Blog layout section because it applies the tracking code across all blog pages automatically.
Test Your Google Analytics Installation
After saving your tracking code, return to Google Analytics.
You can now test whether your Google tag was added correctly.
To test the installation:
Click the Test installation button located in the top right corner
If the connection works properly, Google Analytics will detect your website.
Wait for Data Collection
Google Analytics does not always show data immediately.
You may need to wait:
Several hours
Up to 24 hours
Before traffic data starts appearing across all pages.
Once active, you can start monitoring your visitors directly from your Google Analytics dashboard.
You can also track your website traffic using the official Google Analytics Android or iOS app by logging in with the same Google account connected to your blog.
Some links on this website may be affiliate links, which means SBSAI may earn a commission at no extra cost to you if you purchase through those links. We only recommend tools and services we believe are useful for beginners and content creators. Please read our Affiliate Disclosure and Privacy Policy pages to learn more about how this website works and how your information is handled.
SBSAI is a beginner-friendly blog focused on AI tools, AI prompts, blogging tips, and digital marketing strategies. We share practical guides, helpful resources, and simple tutorials to help creators and beginners use AI to create content, grow online, and build digital businesses using tools like systeme.io and chatgpt.
Newsletter
Subscribe now to get daily updates.